
- Knowledge base
- Scanner Appliance
- Getting started
-
Security updates
-
Product news
-
Next-Gen Vulnerability Management
-
Getting started
-
General
-
Operating status
-
Network & System Security
-
Web Application Security
-
Cloud Security
-
API Security
-
Phishing Simulation & Awareness Training
-
Attack Surface Management
-
Scanner Appliance
-
Device Agent
-
On-premise platform deployment
-
Asset management
-
Vulnerability manager
-
Reports
-
Digest reports
-
Organizer
-
Continuous monitoring
-
Integrations
-
Platform API
-
Remediation
-
Users
-
PCI DSS ASV scans
-
Terms & conditions
-
Dashboard
How do I install a Scanner Appliance?
If you want to install a new Scanner Appliance for local scanning, simply follow these step-by-step instructions.
Before you begin the installation process, we highly recommend that you take a look at the requirements. This step will ensure a smooth and successful installation of the Scanner Appliance.
System requirements
The system requirements need to be set prior to booting the scanner appliance for the first time. Read more about system requirements here:
https://support.holmsecurity.com/knowledge/what-are-the-system-requirements-for-the-scanner-appliance
Firewall requirements
To ensure proper communication between the Scanner Appliance and Security Center, it is important to review the following information:
https://support.holmsecurity.com/knowledge/what-are-the-firewall-settings-for-scanner-appliance
- Login to Security Center.
- Click Scanner Appliance > Add appliance.
- Click On-Premise.
- Click Get started.
- Provide a name for the scanner appliance and download the image suitable for your virtualization host by selecting the icon representing your chosen virtualization platform.
- Click Next twice.
- Write down the appliance token.
- Deploy the image on your virtualization platform and boot it.
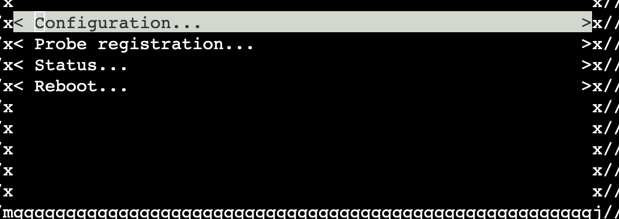
- After the Scanner Appliance is fully booted, a menu will appear. From this menu, you can select the Configuration option to proceed with the setup process.:
- You have the option to select whether you want to use DHCP or assign a static IP address to the Scanner Appliance. Click OK to return to main menu. If you select static, you need to fill out the following values manually:
- IPv4 address
- IPv4 network
- IPv4 gateway
- IPv4 DNS-nameservers
- IPv6 address (optional)
- IPv6 network (optional)
- IPv6 gateway (optional)
- IPv6 dns-nameservers (optional)
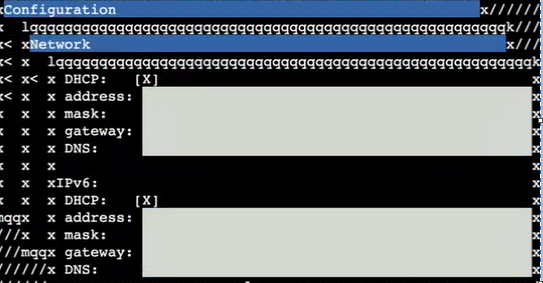
Note: DHCP is the preselected option, if you wish to use the static option, make sure to deselect DCHP by erasing the ["X"].
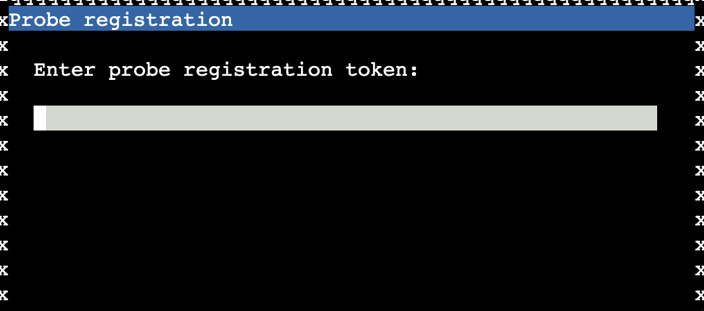
- Then choose option Probe registration, input the token you wrote down in step 2 (in the preparation part), and press press F11 (Fn+F11) to confirm the registration.
Note that if you are using a Macbook, you can save the settings by clicking Actions on the top right menu of the UI console then Guest OS > Send keys > F11.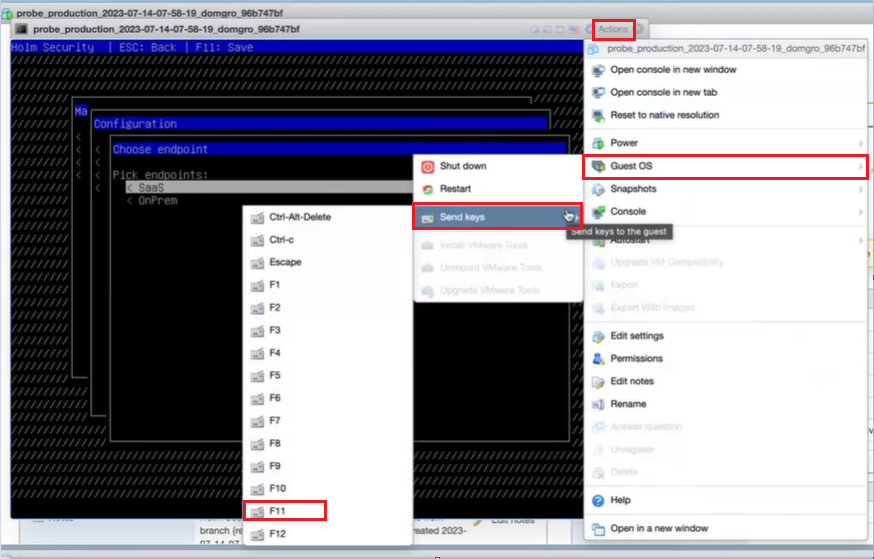
- You have the option to select whether you want to use DHCP or assign a static IP address to the Scanner Appliance. Click OK to return to main menu. If you select static, you need to fill out the following values manually:
- Go back to Security Center > Scanner Appliance.
- After the connection is confirmed by the Security Center, you can proceed to reboot the scanner appliance.
- Done!