These are the credentials you need to use Cloud scanning for Azure:
- Azure Application ID
- Azure Key Value
- Azure Directory ID
- Azure Subscription ID
You must first create a new App registration to find these requirements within your Azure environment. To do this, please do the following:
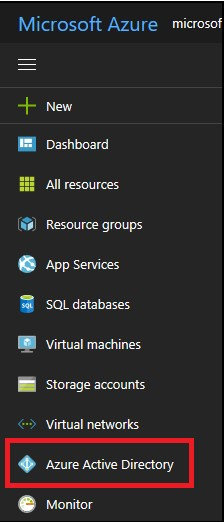
- Log in to your Azure Account through the Azure portal and navigate to the Azure Active Directory service.
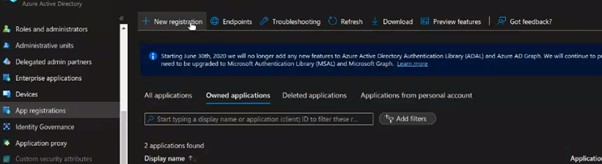
- Click on Azure Active Directory > App registrations.
- Click on New Registration.
- Name your App, i.e., "Holm Security Scanner," and a descriptive name in the Name field.
- Leave the Supported account types default: Accounts in this organizational directory only ([your directory name]).
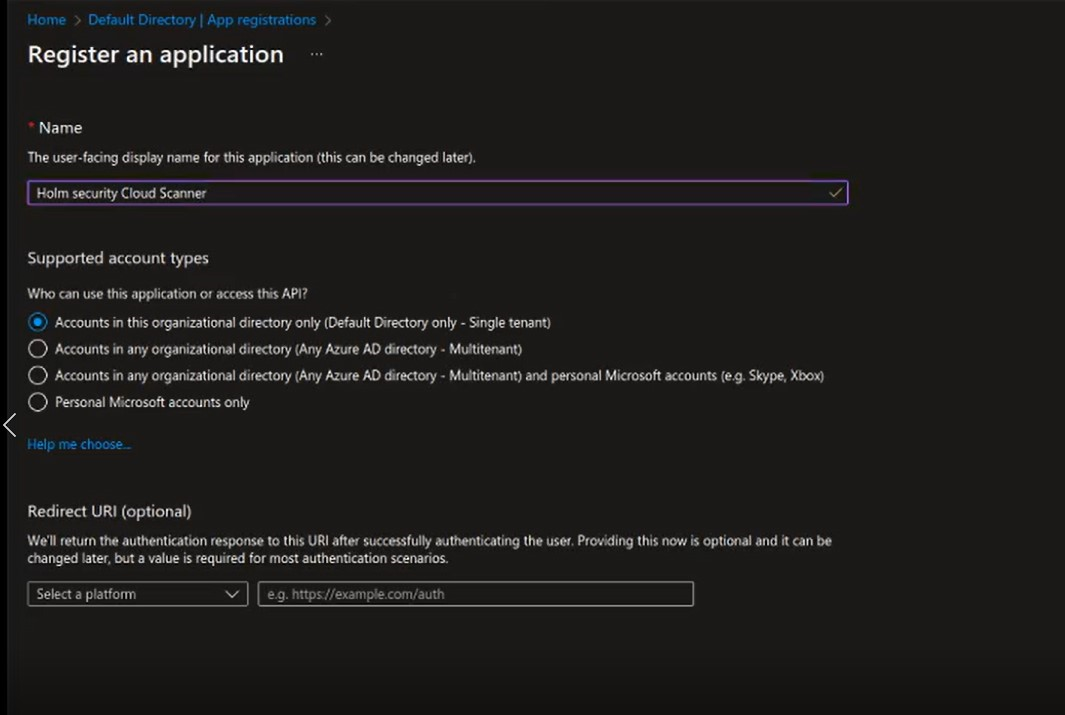
- Click on Register.
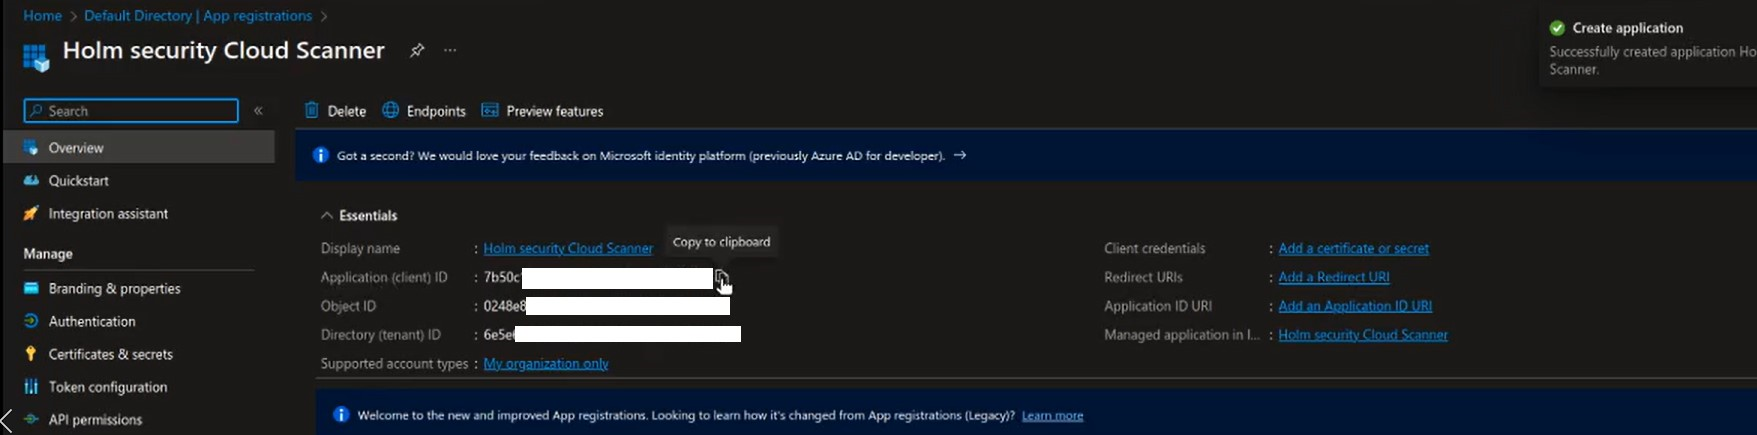
- Now you will see both of the following:
- Application (client) ID should be added to the Azure Application ID field.
- Directory (tenant) ID should be added to the field Azure Directory ID.
- Click on Certificates & secrets.
- Under Client Secrets, click on New Client Secret.
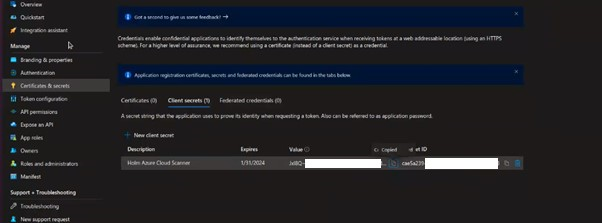
- Enter a Description, i.e., "Holm Security Scanner," and select Expires, i.e., "one year."
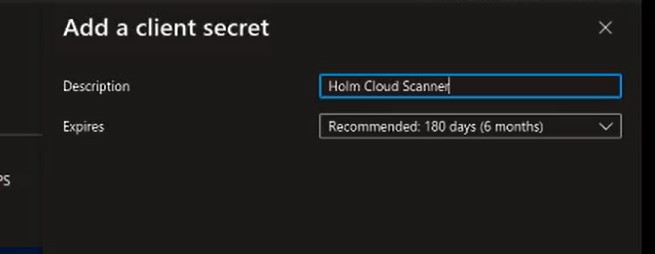
- Click on Add.
- Now, you will see the client's value, which should be added to the field Azure Key Value.
- The client's secret value appears only once. Make sure you store it safely.
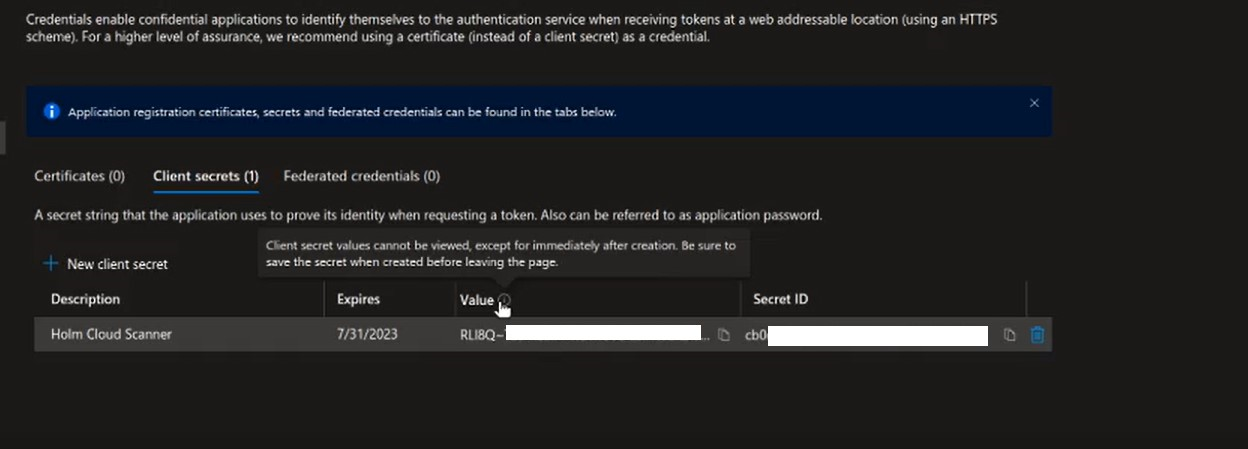
- The client's secret value appears only once. Make sure you store it safely.
Azure Subscription ID
To find the Subscription ID make sure to review this article by Microsoft:
https://learn.microsoft.com/en-us/azure/azure-portal/get-subscription-tenant-id (External link)
Adding IAM Permission for Scanning
- Navigate to Subscriptions.
- Click on Access Control (IAM).
- Go to the Role Assignments tab.
- Click Add > Add role assignment.
- In the Role drop-down, select Security Reader.

- Leave the Assign access to the default value.
- Click Add Members; in the Select drop-down, type the name of the app registration, e.g., "Holm Security Scanner," and select it.
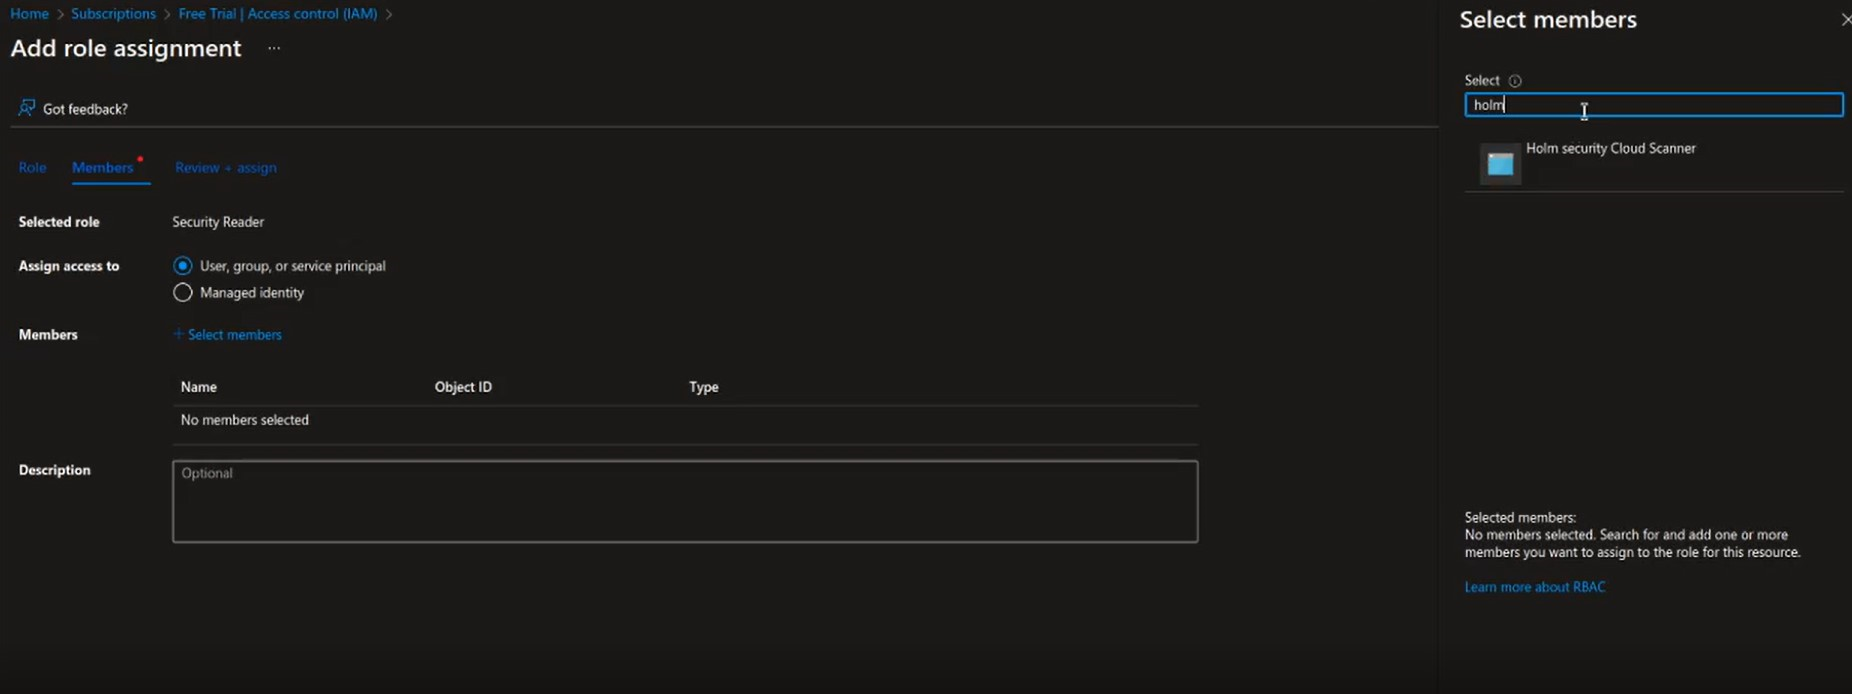
- Click Save.
- Repeat the process for the Log Analytics Reader role.
- Done!