If you want to install a Scanner Appliance for local assessments, simply follow these step-by-step instructions.
Before you begin the installation process, we highly recommend reviewing the requirements. This step will ensure a smooth and successful installation of a Scanner Appliance.
System requirements
The system requirements need to be set before booting a Scanner Appliance for the first time. Read more about the system requirements here:
What are the system requirements for a Scanner Appliance?
Firewall requirements
To ensure proper communication between a Scanner Appliance and your Security Center, it is important to review the following information:
What are the firewall settings for a Scanner Appliance?
- Log in to your Security Center.
- In the main navigation bar, hover over Assessments.
- From the dropdown menu that appears, select Scanner appliances.
- Click + Add appliance.
- Choose On-Premise.
- Click Get started.
- Provide a name for the Scanner Appliance, then download the image suitable for your virtualization host by selecting the icon representing your chosen virtualization platform.
- Click Next twice.
- Write down the token.
- Deploy the image on your virtualization platform and boot it.
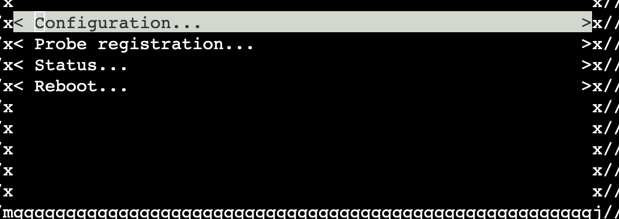
- After the Scanner Appliance is fully booted, a menu will appear. From this menu, you can select the Configuration option to proceed with the setup process.
- You have the option to select whether you want to use DHCP or assign a static IP address to the Scanner Appliance. If you select static, you need to fill out the following values manually:
- IPv4 address
- IPv4 network
- IPv4 gateway
- IPv4 DNS-nameservers
- IPv6 address (optional)
- IPv6 network (optional)
- IPv6 gateway (optional)
- IPv6 dns-nameservers (optional)
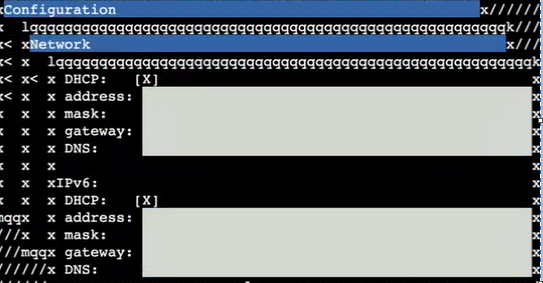
Note: DHCP is the preselected option. If you wish to use the static option, make sure to deselect DHCP by erasing the ["X"].
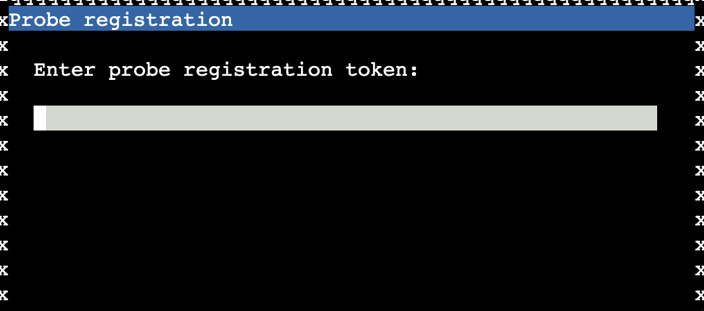
- Select Probe registration, input the token you wrote down in step 9, and press F11 to confirm the registration.
Notice that if you are using a MacBook, you can save the settings by clicking Actions in the top-right menu of the UI console, then Guest OS > Send keys > F11.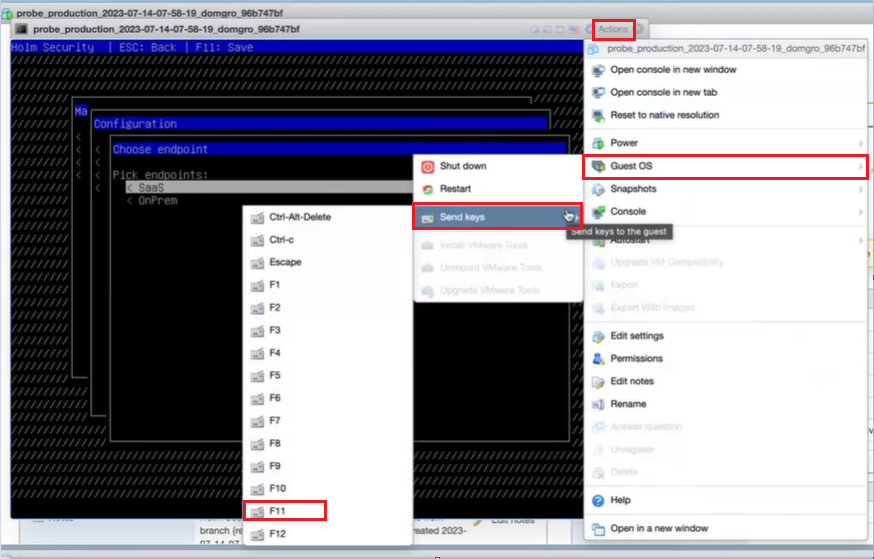
- You have the option to select whether you want to use DHCP or assign a static IP address to the Scanner Appliance. If you select static, you need to fill out the following values manually:
- Go back to your Security Center.
- In the main navigation bar, hover over Assessments.
- From the dropdown menu that appears, select Scanner appliances.
- After the connection is confirmed by your Security Center, you can proceed to start an assessment.