For more information and configuration regarding Single sign-on in Security Center, read this article:
https://support.holmsecurity.com/hc/en-us/articles/360014407379
Creating a single sign-on application in OneLogin
On the OneLogin portal, make sure you are logged in as an administrator and navigate to:
- Administration tab.
- Click Applications.
- Click Add App.

- Search for “SAML Test Connector (Advanced)”, scroll down and click on the app for SAML2.0.
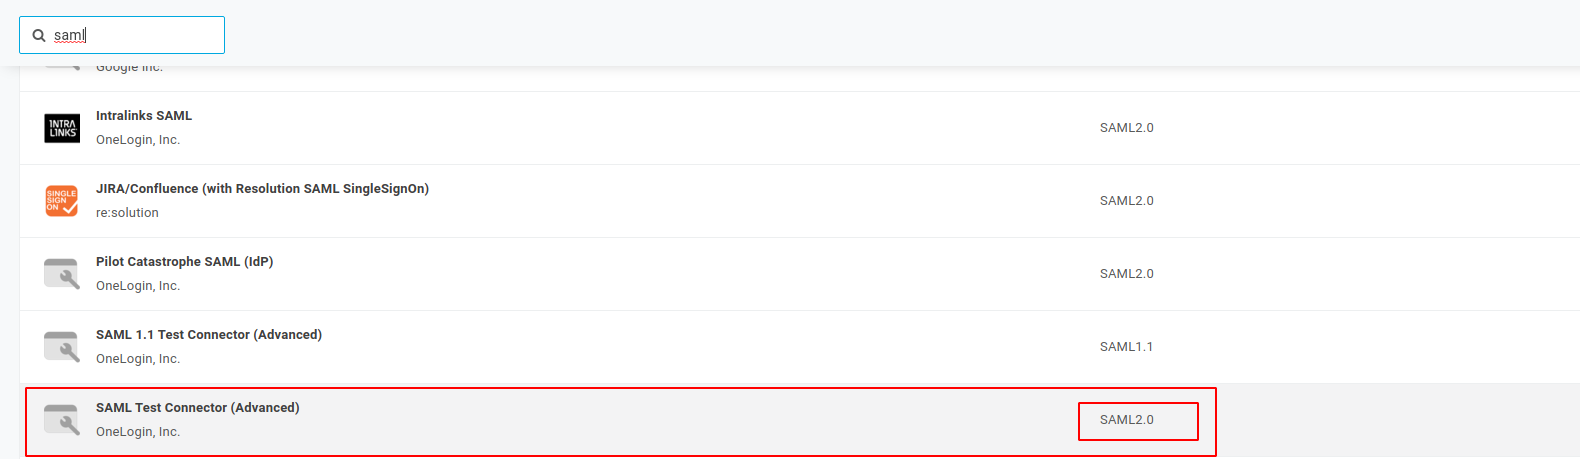
- Click Save in the top right corner.
- Download the SAML metadata file now to be able to upload the file in Security Center, or follow the instructions further down to manually copy the information.

Please ensure that the following information in OneLogin is correct and the fields are the same as below:
- Sign on method – SAML2.0
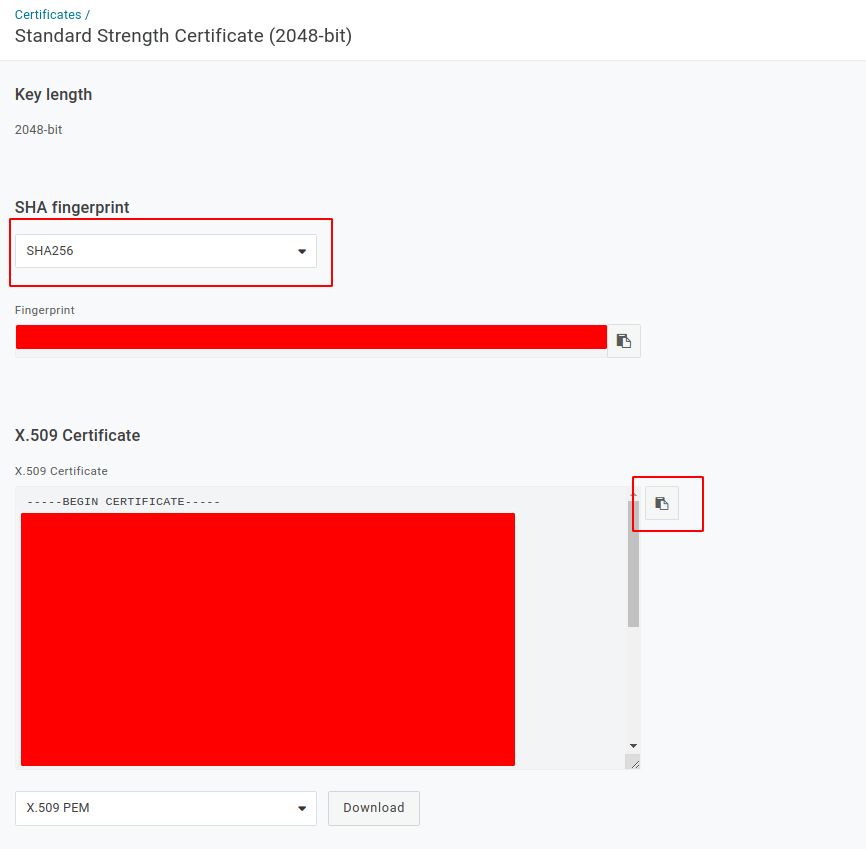
- X.509 Certificate – Standard Strength Certificate (2048)
- SAML Signature Algorithm – SHA-256

- Click on View Details on the Certificate.
- Ensure that the SHA algorithm is “SHA-256”.
- Copy the Certificate (only if you are manually copying the information) for later use.

Configure Single Sign-On in your Security Center
Upload the downloaded META file:
- Login to Security Center.
- Click Settings in the main menu in the top right corner.
- Click Single sign-on.
- If you have not already enabled single sign-on – Enable single sign-on and set up a name.
- Scroll down to IDP SAML Configuration and click Metadata file.
- Click Choose File and upload your downloaded metafile.
- Click OK.
Manually copy the information (Skip this section if you uploaded the file):
- Login to Security Center.
- Click Settings in the main menu in the top right corner.
- Click Single sign-on.
- If you have not already enabled single sign-on – Enable single sign-on and set up a name.
- Scroll down to IDP SAMIL Configuration and click Manual.
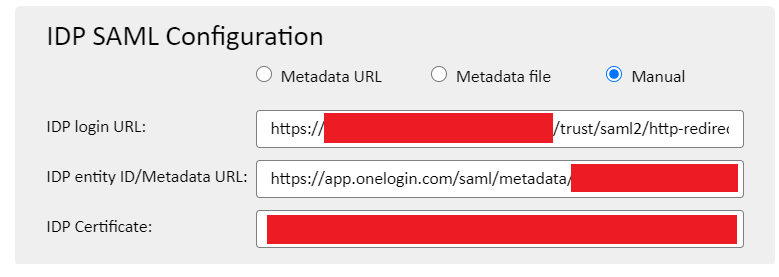
- Copy the following information from OneLogin to Security Center:
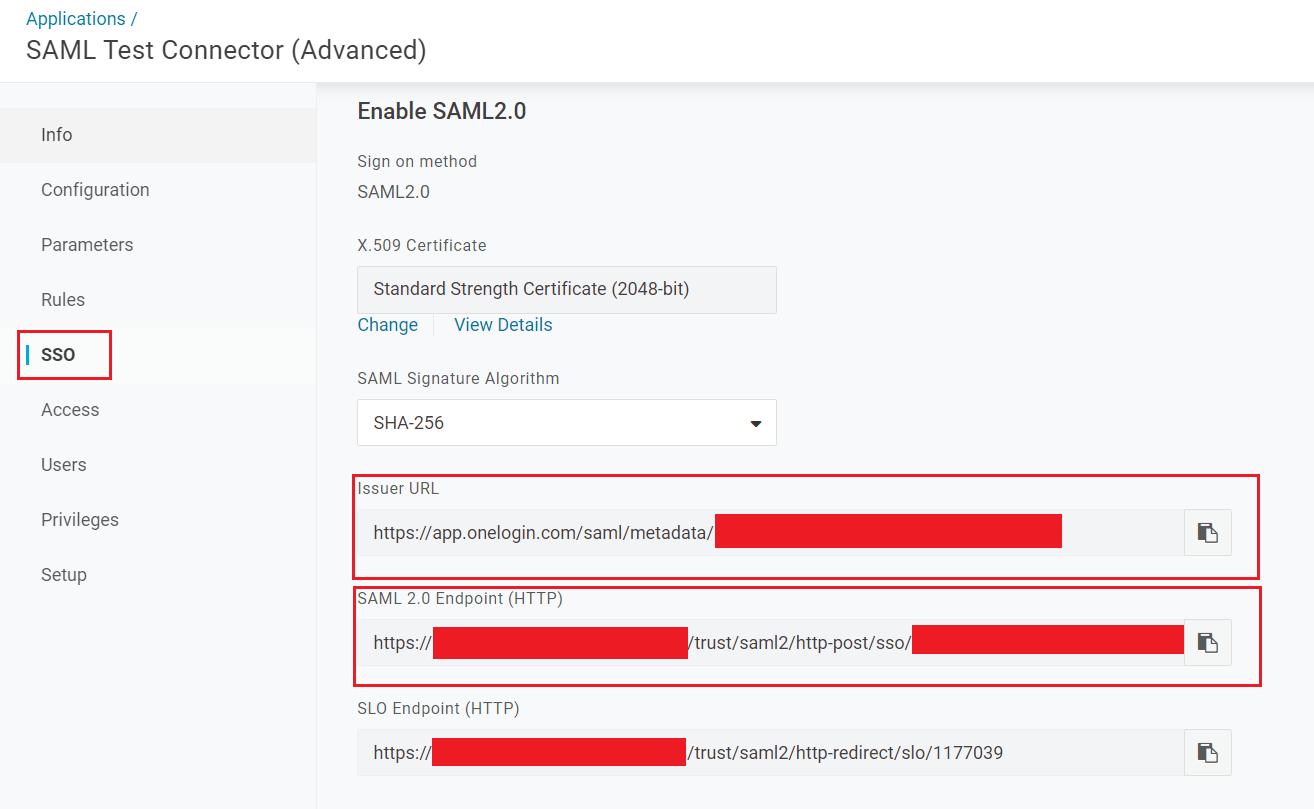
- Your recently copied certificate > IDP Certificate
- Issuer URL > IDP entity ID/Metadata URL
- SAML 2.0 Endpoint (HTTP) > IDP login URL
- Click OK.
Configure Single sign-on in OneLogin
- Login to Security Center.
- Click Settings in the main menu in the top right corner.
- Click Single sign-on.
- Scroll down to Security Center.
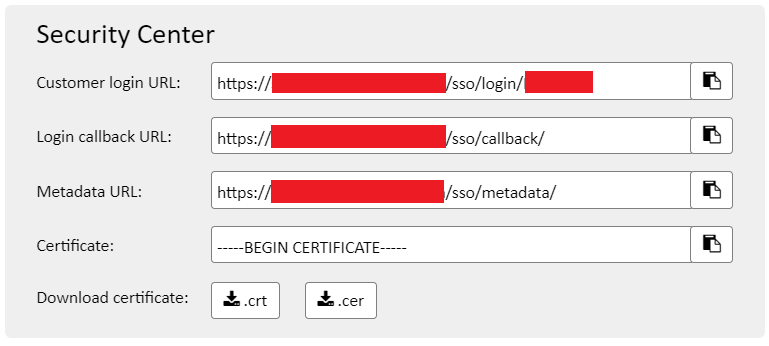
- Copy the following information from Security Center to OneLogin:
- Customer login URL > RelayState
- Login callback URL > Recipient
- Metadata URL > Audience (EntidyID)
- Login callback URL > ACS (Consumer) URL
- ACS URL Validator: This is the regex validator to secure the connection between OneLogin and SP like Holm Security Center. So if the callback url is 'https://sc-dev.holmsecurity.com/sso/callback/' then the validator expression could be ^https:\/\/ab-cde.holmsecurity.com\/sso\/callback\/.
Hint: The first character should be caret "^" and every "/" should be preceded by \.
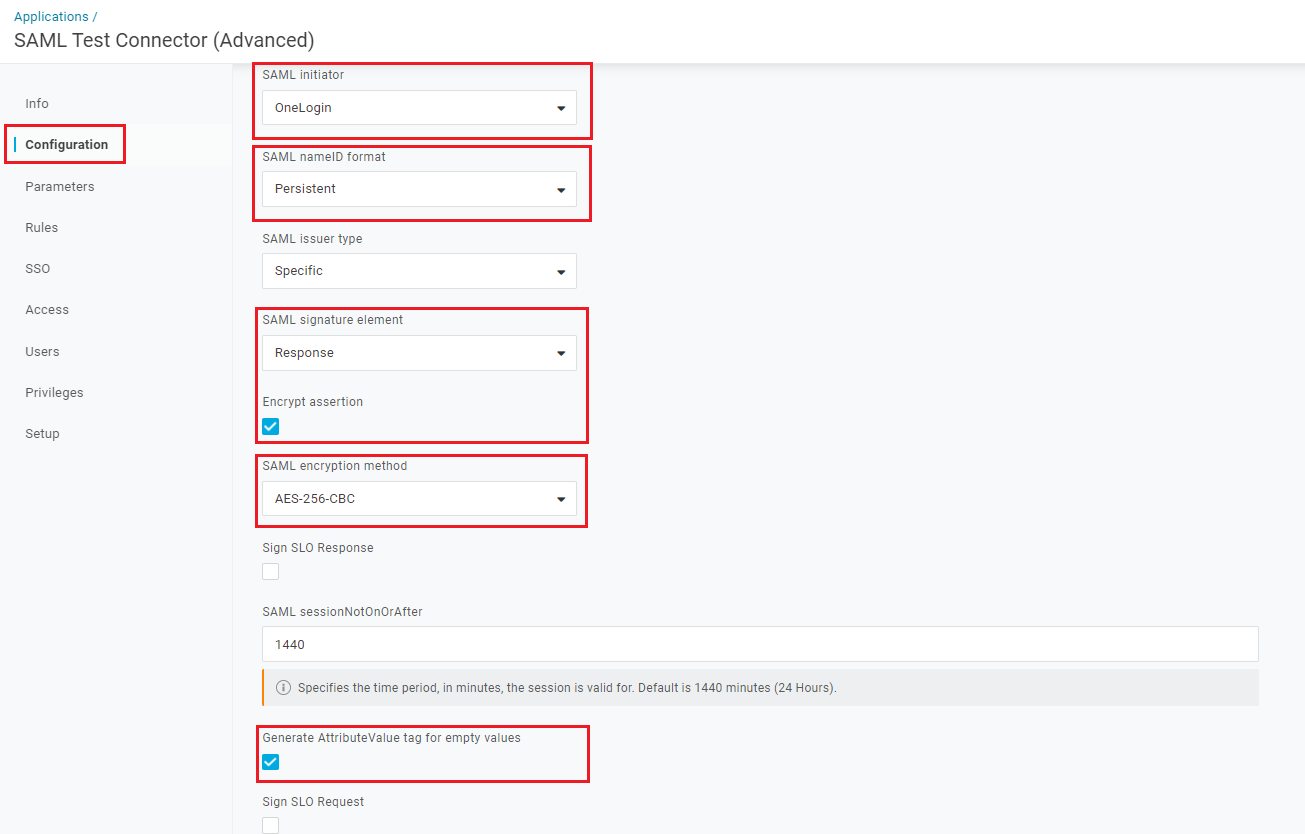
- Please ensure that the fields are the same as below:
- Click Save in the top right corner.
- Go back to Holm Security Center and copy the certificate.
- Go back to OneLogin, there will now be a field where you can paste the certificate:

User Data
- Click on Parameters.
- Click + and add the parameters exactly as shown below.
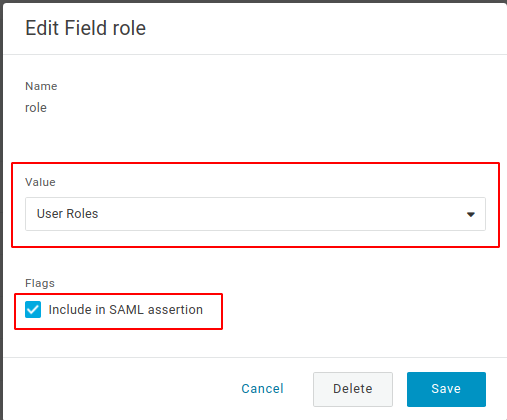
Note: Please ensure to select the values from drop-down menu instead of manual/text-field, type in the correct name as below and press Enter. Then click on the relevant table row to get the dropdown menu to select the value.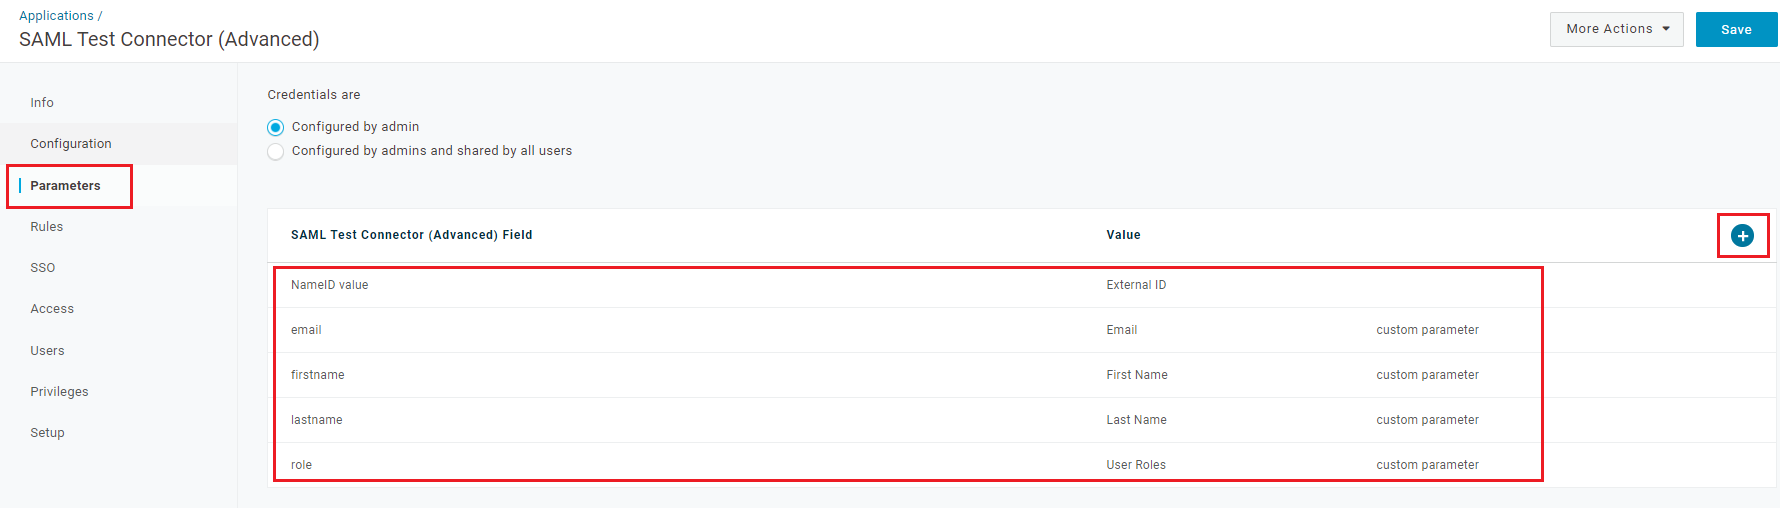
Add application to user/users
All the users that are going to be using single sign-on need permission to be granted access to the application:
- Select the user/users that needs permission and add the application as shown in the picture below.
