For more information and configuration regarding Single Sign-On in your Security Center, read this article:
How do I set up Single Sign-On?
Requirements
To use ADFS to log in to the Security Center, you need:
- An Active Directory instance where all users have the email address attribute set.
- A server running Microsoft Server 2019 (it may also work with older versions). This guide uses screenshots from Server 2019.
-
After you meet these basic requirements, you need to install ADFS on your server. Configuring and installing ADFS is beyond the scope of this guide, but is detailed in a Microsoft KB article.
-
ADFS must use a CA-signed certificate for service communication, token decryption, and token signing.
You will need the following from Holm Security:
- Certificate
- Login URL
Holm Security has to be provided with the following:
- CRT file of the certificate on the ADFS server
- XML file for ADFS (Original: https://<adfs server>/federationMetadata/2007-06/FederationMetadata.xml )
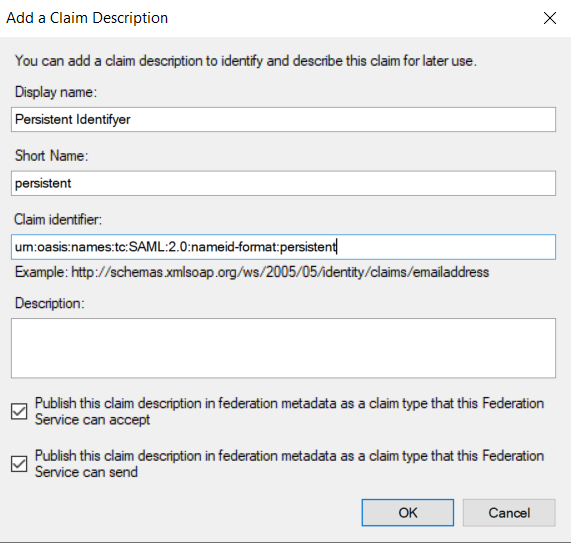
Add Persistent Identifiers
Open AD FS Management and go to the Claim Description Folder. On the right side, click Add Claim Description.
Add the following:
- Display name: Persistent identifier
- Short name: persistent
- Claim identifier: urn:oasis:names:tc:SAML:2.0:nameid-format:persistent
- Check the box: Publish this claim description in federation metadata as a claim type that this Federations Service can Accept
- Check the box: Publish this claim description in federation metadata as a claim type that this Service can send
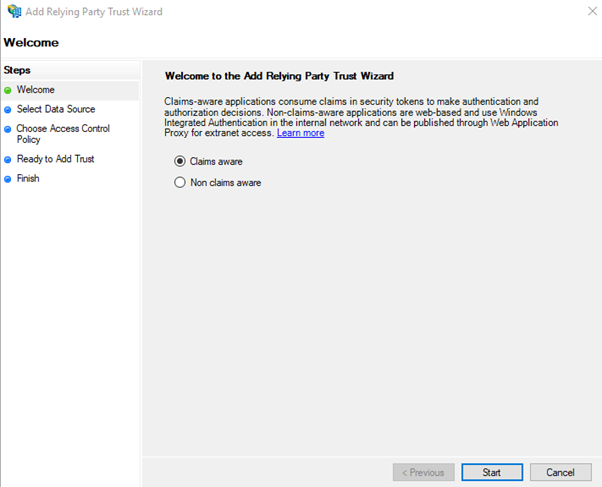
Add Relying Party Trust
- Go to the folder “Relying Party Trust”. Click on “Add Relying Party Trusts..” in the right menu
- Select “Claims Aware” and click in “Start”
- Select “Enter Data about the relying party manually” and click on “Next >”

- Enter display name, for example, “Holm Security” and click on “Next >”

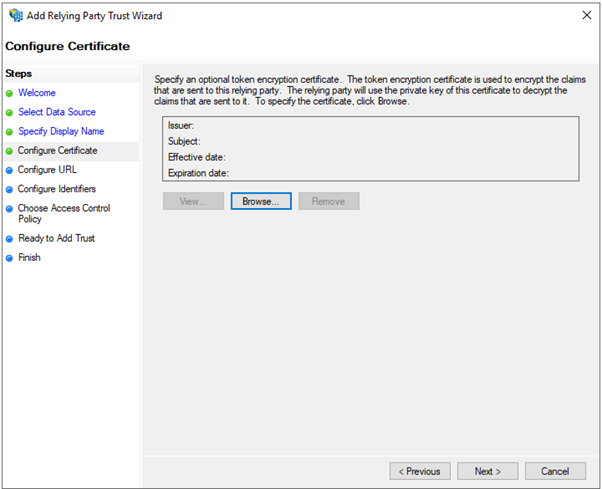
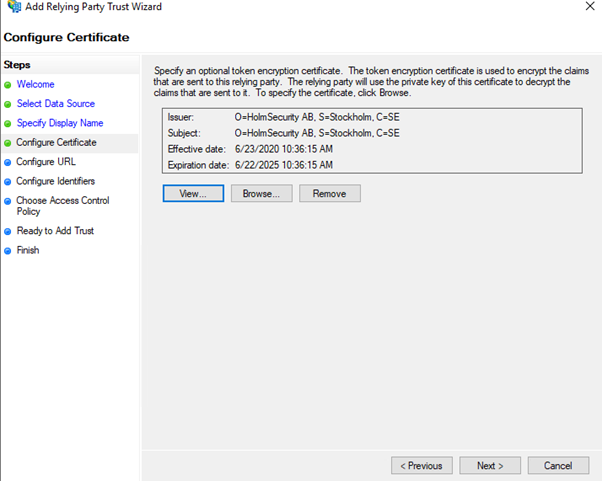
- Click on “Browse…” and browse the certificate you got from Holm Security
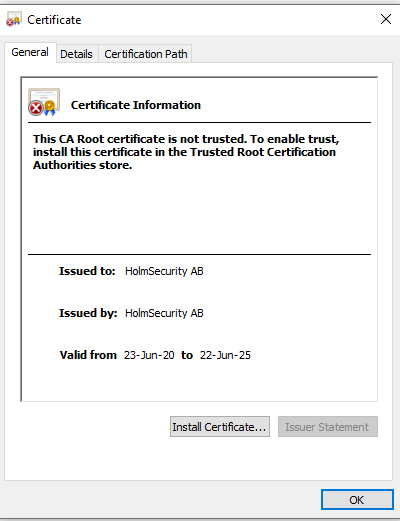
- Click on “View…”

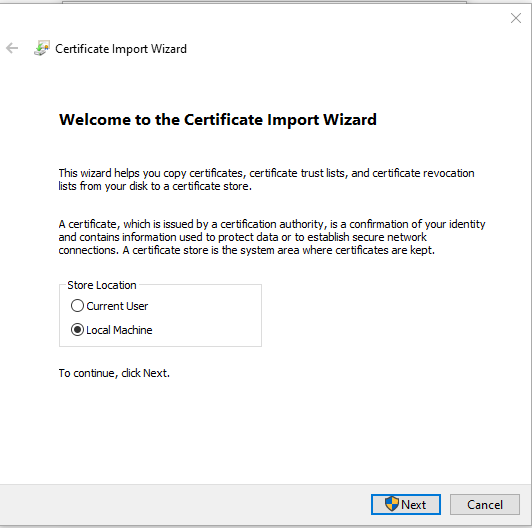
- Click on Install certificate…
- Select “Local Machine” and click on “Next”
- Select “Place all Certificates in the following Store” and click on “Browse…”

- Select the “Trusted Root Certification Authorities” and click on “OK”

- Click on “Next"

- Click On “Finish”
- Click on "Next"
- Select “Enable Support for the SAML 2.0 WebSSO Protocol” and enter https://sc.holmsecurity.com/sso/callback
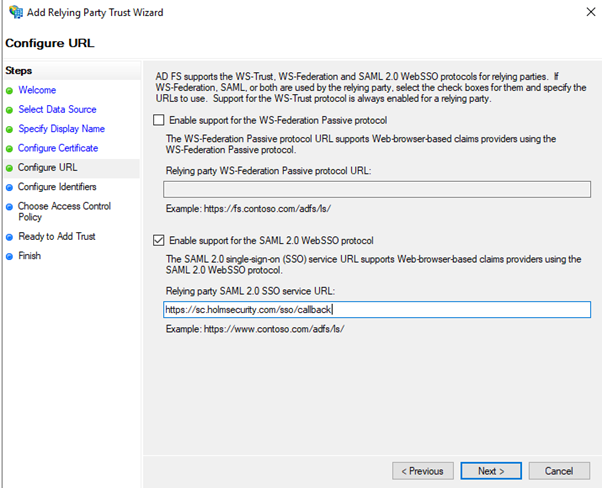
- Add Relying party trust identifyer: Enter https://sc.holmsecurity.com/sso/metadata and click on Add and then click on “Next >”

- Select Permit Everyone and click on “Next >”

- Click on “Next >”

- Click on “Close”

Edit Relying Party Trust
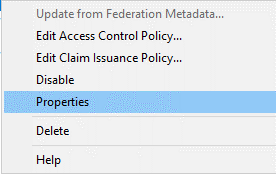
- Right-click on the Trust you just created and select “Properties”
- Go to Signature and click on “add…” and browse the signature you added when you configured the party trust.

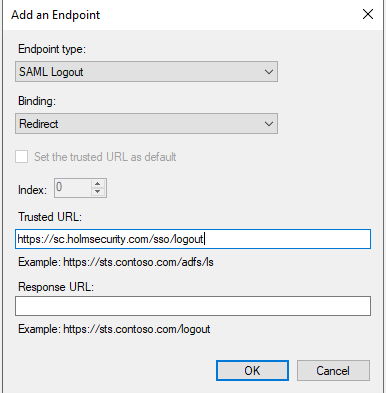
- Go to Endpoints and click on Add SAML…
- Select: Endpoint type “SAML Logout”
- Select Binging: “Redirect”
- Trusted URL: “https://sc.holmsecurity.com/sso/logout”
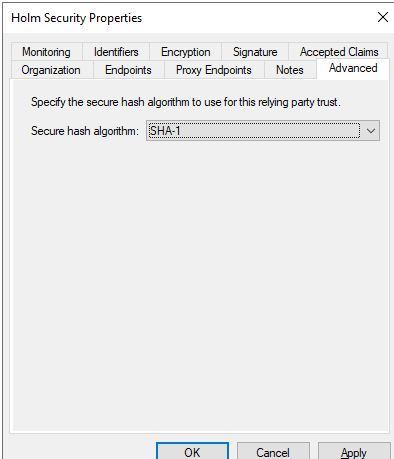
- Go to Advanced Select Secure Hash Algorithm: SHA1
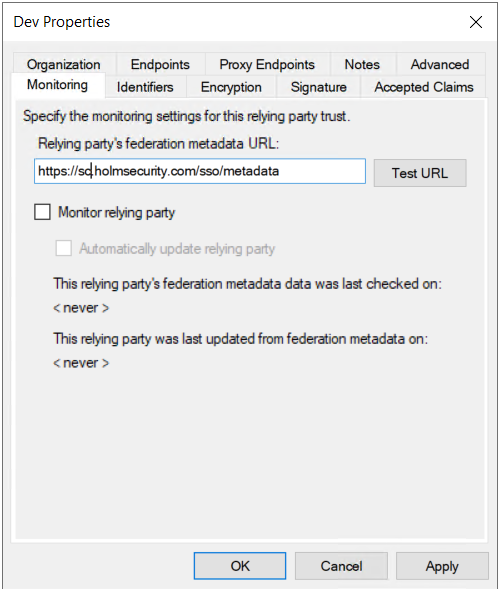
- Go to Monitoring and enter: https://sc.holmsecurity.com/sso/metadata
- Click On “OK”
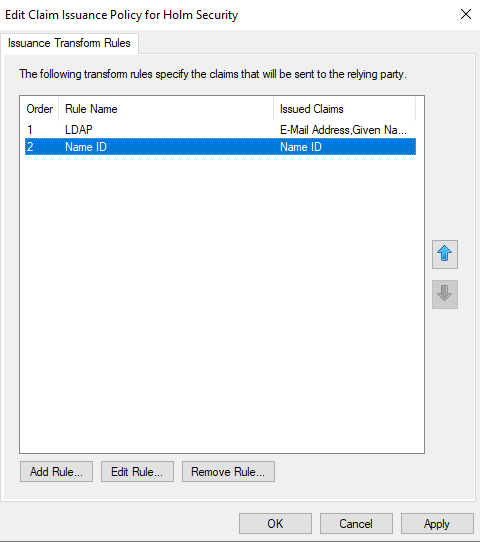
Edit Claim Issuance Policy
- Click on “Edit Claim Issuance Policy” and on the right side, click on “Edit Claim Issuance Policy”
- Click on Add Rule…
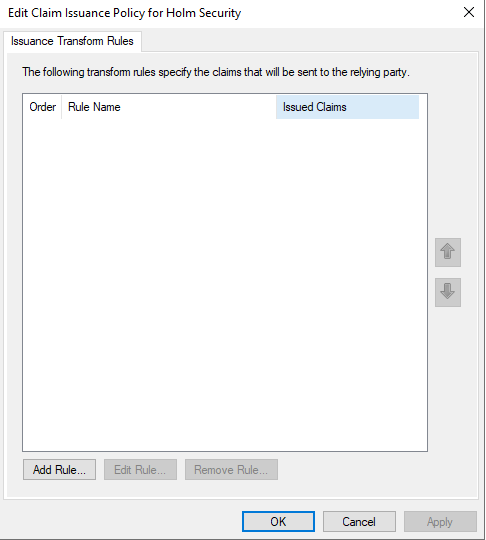
- Select “Send LDAP Attribute as Claims” and click on “Next >”

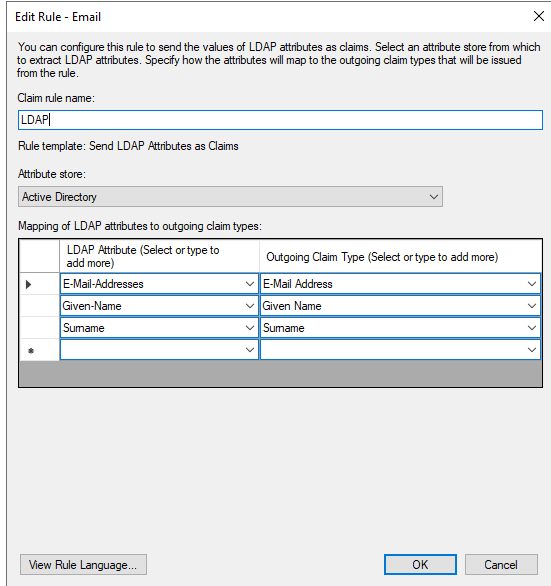
- Configure the Claim Rule with the following and press Finish
- Write the Claim rule name example, “LDAP”
- Select Attribute Stores: “Active Directory”
- Email (required) Ldap Attribute: “E-Mail: Address” à Outgoing Claim Type: “E-Mail Address”
- First name: Ldap Attribute: E-Mail: “Given-Name” à Outgoing Claim Type: “Given Name”
- Last name: Ldap Attribute: E-Mail: “Surname” à Outgoing Claim Type: “Surname”
- Press OK
- Add a second rule by clicking on “Add Rule…”

- Select “Transform an Incoming Claim” and click on Next >

- Enter a name and configure the Claim Rule with the following and click on Finish
- Incoming Claim Type UPN
- Outgoing claim Type “Name ID”
- Outgoing name ID format “Persistent Identifier”
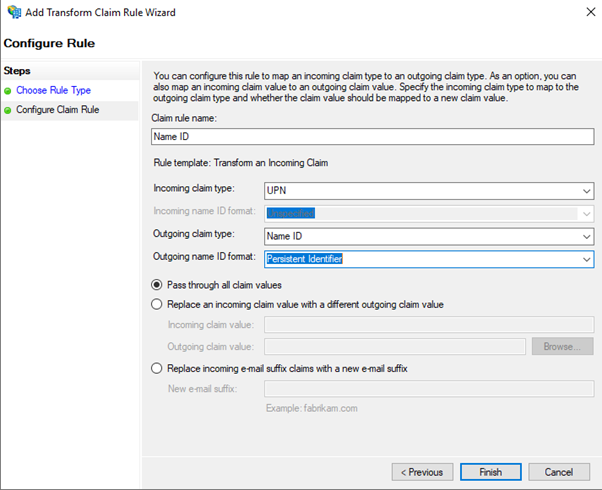
- Click on “OK”
Run Powershell
Run the following three Powershell commands:
- Get-AdfsRelyingPartyTrust -Identifier https://sc.holmsecurity.com/sso/metadata | Set-AdfsRelyingPartyTrust -SigningCertificateRevocationCheck None -EncryptionCertificateRevocationCheck None
- Set-ADFSRelyingPartyTrust -TargetName “Holm Security” -SamlResponseSignature "MessageAndAssertion"
- Update-AdfsRelyingPartyTrust -TargetName "Holm Security"
Enable Relay state
- In a standard text editor, open the appropriate configuration file:
- On Microsoft Windows 2008 R2 Server platforms, open the web.config file. This file is typically located at C:\inetpub\adfs\ls\
- On Microsoft Windows 2012 and later the Microsoft.IdentityServer.Servicehost.exe.config file. This file is typically located at C:\Windows\ADFS\
- Add the following entry between<microsoft.identityServer.web> and </microsoft.identityServer.web>:
<useRelayStateForIdpInitiatedSignOn enabled="true" />
- Run the following powershell command in powershell: Set-AdfsProperties -EnableRelayStateForIdpInitiatedSignOn $true
Optional: RelayState URL
You need to change the beginning and the end. The beginning is the URL to your ADFS and the last one is the end of Your log on page: https://<adfs page> /adfs/ls/idpinitiatedsignon.aspx?Relaystate=RPID=https%3A%2F%2Fsc.holmsecurity.com%2Fsso%2Fmetadata%26RelayState=https%3A%2F%2Fsc.holmsecurity.com%2Fsso%2Flogin%<End of custom login URL>
FAQ
-
If you get the following error: “Signature validation failed. SAML Response rejected”
Check that your certificate is Trusted CA Signed SSL Certificate in AD FS Management and in the Certificate folder.

-
If you get the following error: “User not found against Customer account”
The user doesn’t match any user at Holm Security. Verify the UserPrincipalName against username at Holm Security and verify that the user has an E-mail Address attribute.
You got the following error: “Single sign-on failed. Please check the configuration”
Follow every step in the guide above again.
And run the following powershell command again:
Update-AdfsRelyingPartyTrust -TargetName "Holm Security"
-
If you get the following error: “The Message of the Response is not signed and the SP require it”
Run the following powershell command:
- Get-AdfsRelyingPartyTrust -Identifier https://sc.holmsecurity.com/sso/metadata | Set-AdfsRelyingPartyTrust -SigningCertificateRevocationCheck None -EncryptionCertificateRevocationCheck None
- Set-ADFSRelyingPartyTrust -TargetName “Holm Security” -SamlResponseSignature "MessageAndAssertion"
-
If you get the following error in event viewer:
"Microsoft.IdentityServer.Protocols.Saml.SamlProtocolSignatureAlgorithmMismatchException: MSIS7093: The message is not signed with expected signature algorithm. Message is signed with signature algorithm http://www.w3.org/2000/09/xmldsig#rsa-sha1. Expected signature algorithm http://www.w3.org/2001/04/xmldsig-more#rsa-sha256."
Change the Secure hash algorithm to SHA-1
- Go to AD GS Management
- Go to the Following Relying Party Trusts
- Right click on the identifier click on Properties
- Click on the Advanced tab
- Select Secure Hash algorithm: “SHA-1”