For more information and configuration regarding Single Sign-On (SSO) in your Security Center, read this article:
https://support.holmsecurity.com/hc/en-us/articles/360014407379
Create a Single Sign-On application in Azure
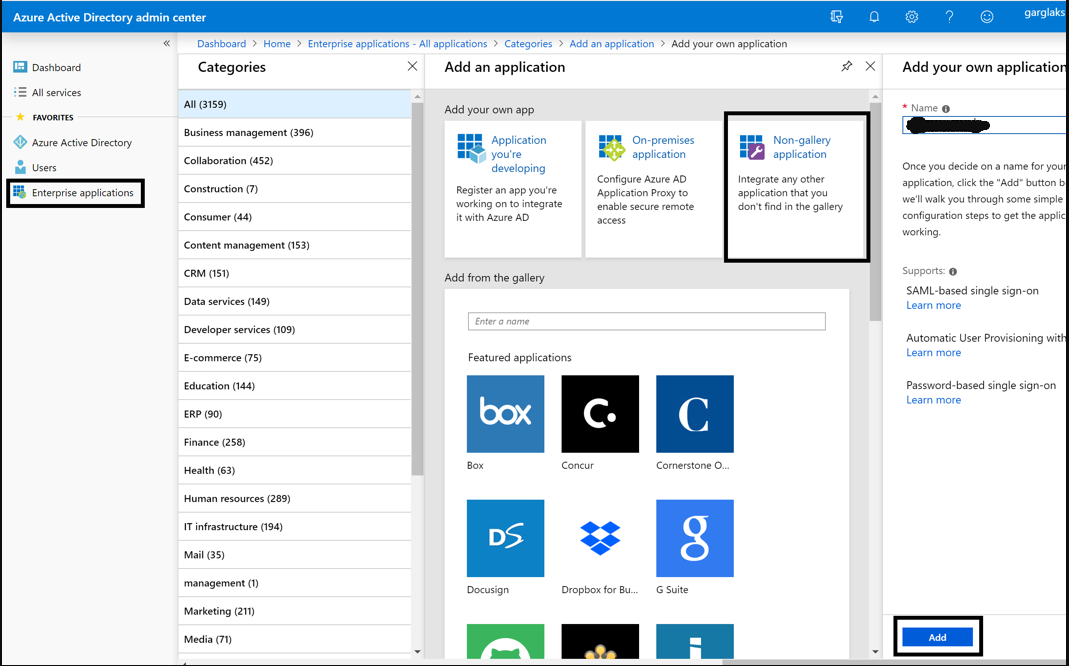
In the Azure Admin center, navigate to:
- Azure Active Directory
- Enterprise Applications
- New Application
- Select the Non-Gallery application (within the new tile).
Provide a name to the application and click on Add.
Configure Single Sign-On in your Security Center
Here, you will need both the Azure Admin center Single Sign-On settings and your Security Center Single Sign-On settings.
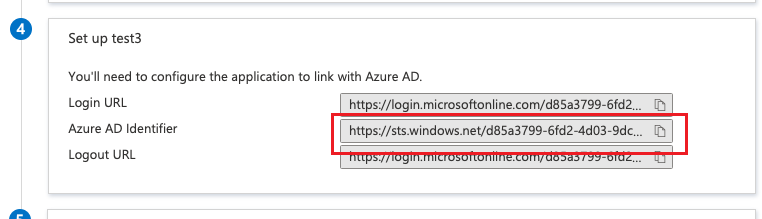
- Navigate to the newly created Azure application and click on Single Sign-On in the left panel.
- Log in to your Security Center > Account settings > Single Sign-On.
- Scroll down to the section IDP SAML Configuration and choose Manual.

- Copy the Login URL from your SSO APP and paste it into the IDP login URL field.

- Copy the Azure AD Identifier URL from your SSO APP and paste it into the IDP entity ID/metadata URL field.
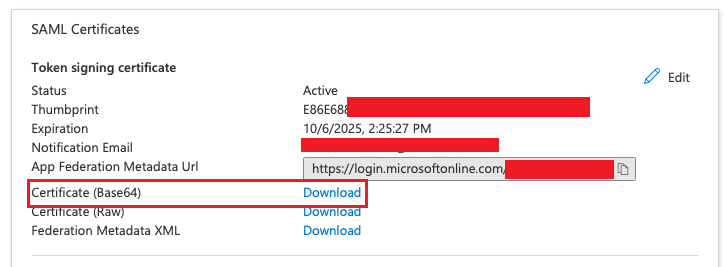
- Click Download on the Certificate (Base64), open the certificate with a text editor, copy the whole parameter, and paste it into the IDP Certificate field.
- Uncheck the Encrypt Assertion element box.
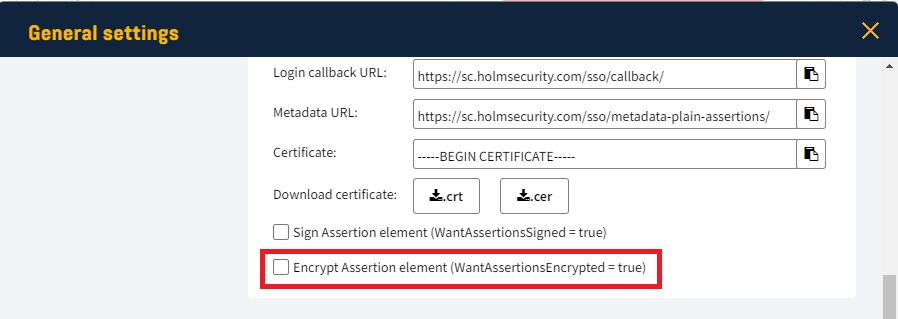
- Click OK.
Configure Single Sign-On in the Azure Admin center
From your Security Center, copy the Single Sign-On data from within your account. You can find out what fields to use here:
How do I set up Single Sign-On?
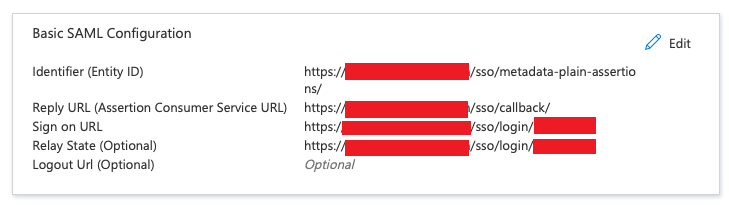
Enter the copied data in the Basic SAML Configuration section of the Azure Admin center.
Note: the red zone in the image below contains the unique token strings
Navigate back to the application overview and click on the Edit button for the SAML Signing Certificate section:
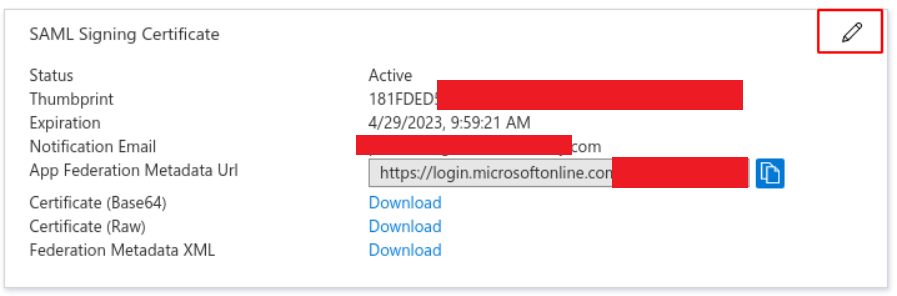
Ensure that the configuration algorithm and options match these values exactly:
- Signing Option = Sign SAML response and assertion
- Signing Algorithm =SHA-256 or SHA-1

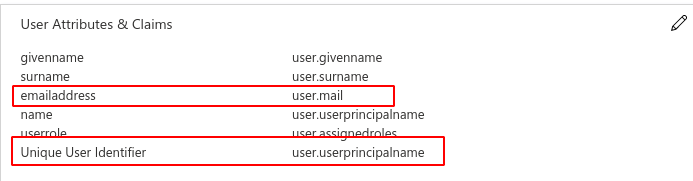
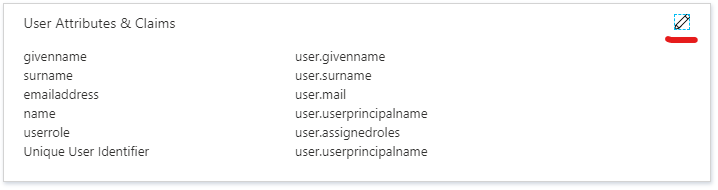
In the section User Attributes & Claims, it is configured how attributes from the user are mapped to the user inside your Security Center. Read more here:
Single Sign-On user attribute mapping
The fields below are mandatory, and the default values are normally enough (red-marked in the image):
- emailaddress
- Unique User Identifier (also referred to as NameID)
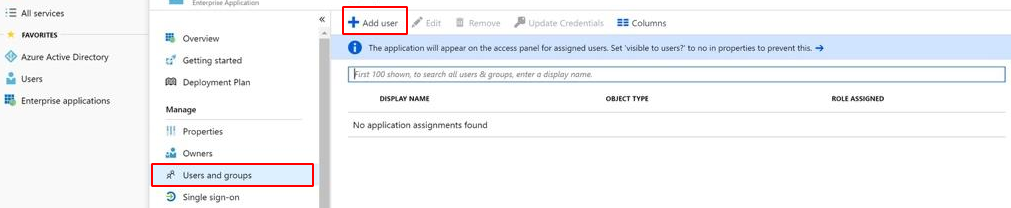
Finally, you can add the users or groups that should have access to your Security Center via this SSO app by navigating to Users and groups in the left panel menu:
Configure the mapping of roles
By default, a user is assigned the lowest-privileged role, User, in your Security Center. To assign the Superuser role to a user, use Azure roles and attribute mapping.
Navigate to the section User Attributes & Claims and press on the edit action at the top right corner.
Select Add New Claim and enter the following information as a minimum:
- Name = userrole
- Namespace = http://schemas.microsoft.com/ws/2008/06/identity/claims/role
- Source attribute = user.assignedroles
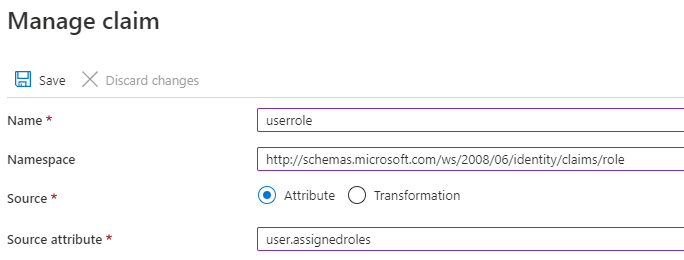
Proceed by pressing Save.
This will allow you to assign the appropriate role to users who should be mapped as Superusers in your Security Center.
The supported role name (value) for the userrole attribute can be found here:
Single Sign-On user attribute mapping.
The recommended approach is to create a new, unique role inside Azure AD using the supported names. This role can then be assigned to users who should have the Superuser role in your Security Center.