For more information and configuration regarding Single sign-on in Security Center, read this article:
https://support.holmsecurity.com/hc/en-us/articles/360014407379
Create a single sign-on application in Okta
- On the Okta portal, make sure you are logged in as an administrator and ensure the 'Admin' view is active.

Note: You need to be a Super Admin in Okta to be able to create a new app.
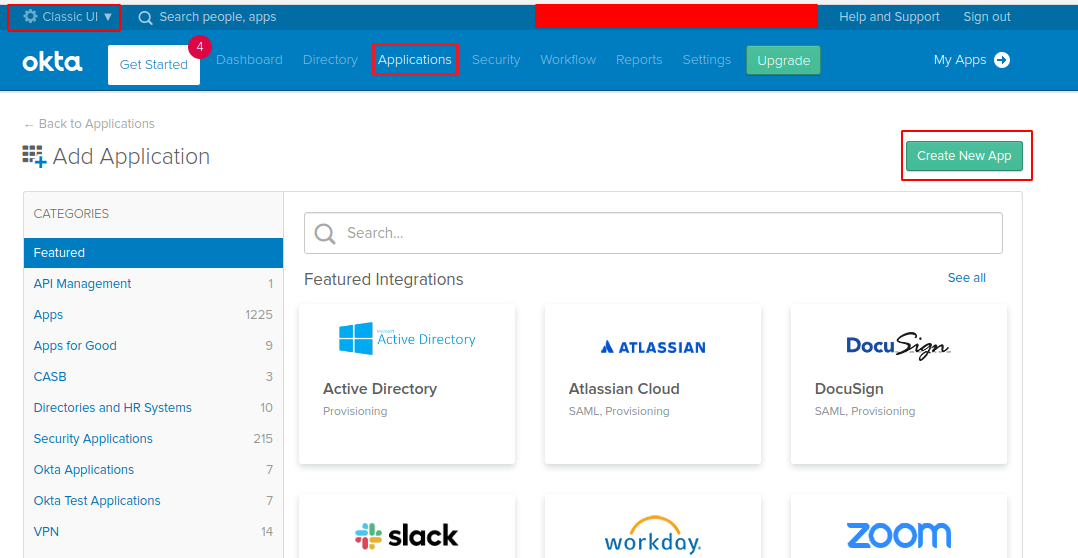
- Please make sure 'Classic UI' in the left panel is active
- Click Applications.
- Click Add Application.
- Click Create New App.
- Please ensure that red squared fields have the correct values.
- Click Create.

- Provide an App name and click Next.

Configure Single Sign-On in Okta
- Click Show Advanced Settings.
- Please ensure that the red squared fields have correct values.
Note: You will need to login to Holm Security Center and copy some of the information, this is described below.
From Holm Security, copy the Single sign-on data from within your account in Security Center.
- Login to Security Center.
- Click Settings in the main menu in the top right corner.
- Click Single sign-on.
- If you have not already enabled single sign-on – Enable single sign-on and set up a name.
- Scroll down to Security Center.

- Copy the following information from Security Center to Okta:
- Customer login URL > Default RelayState
- Login callback URL > Single sign on URL
- Metadata URL > Audience URI (SP Entidy ID)
- Download certificate in .crt format > Upload to Encryption Certificate
- Bookmark Customer login URL in your personal browser, this will be your login URL to Security Center using Okta as single sign-on.
Attributes Statements
In the section Attributes Statements it is configured how attributes from the user are mapped to the user inside of Security Center. Read more here: Single sign-on user attribute mapping
- Ensure that the user data table looks like the picture below.
Note: Please ensure to type in the exact name and to select the values from the drop-down menu instead of manually typing them in.

- Proceed by pressing Next then Finish.
Configure Single Sign-On in your Security Center
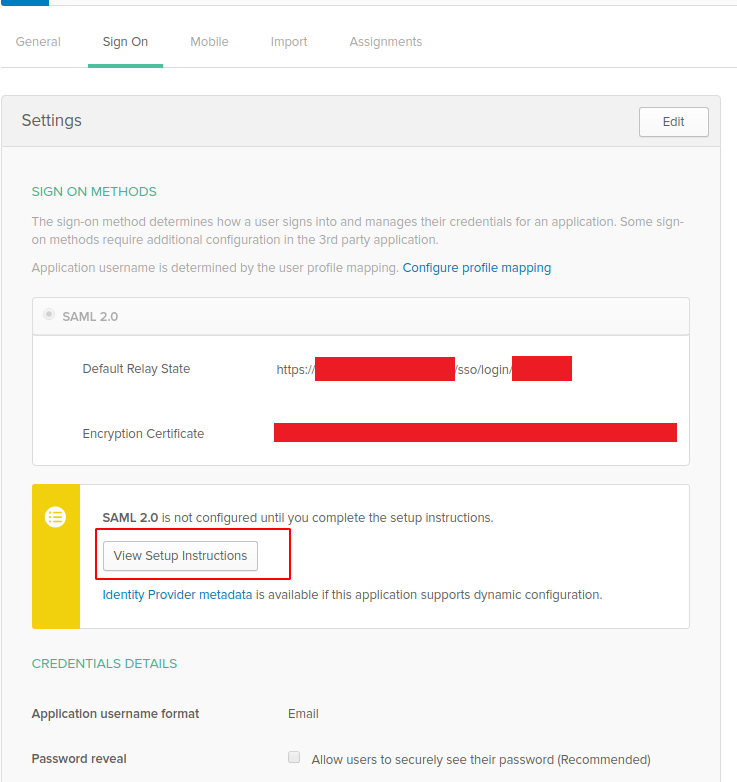
- Click on View Setup Instructions.
- Login to Security Center.
- Click Settings in the main menu in the top right corner.
- Click Single sign-on.
- Scroll down to IDP SAML Configuration and click Manual.

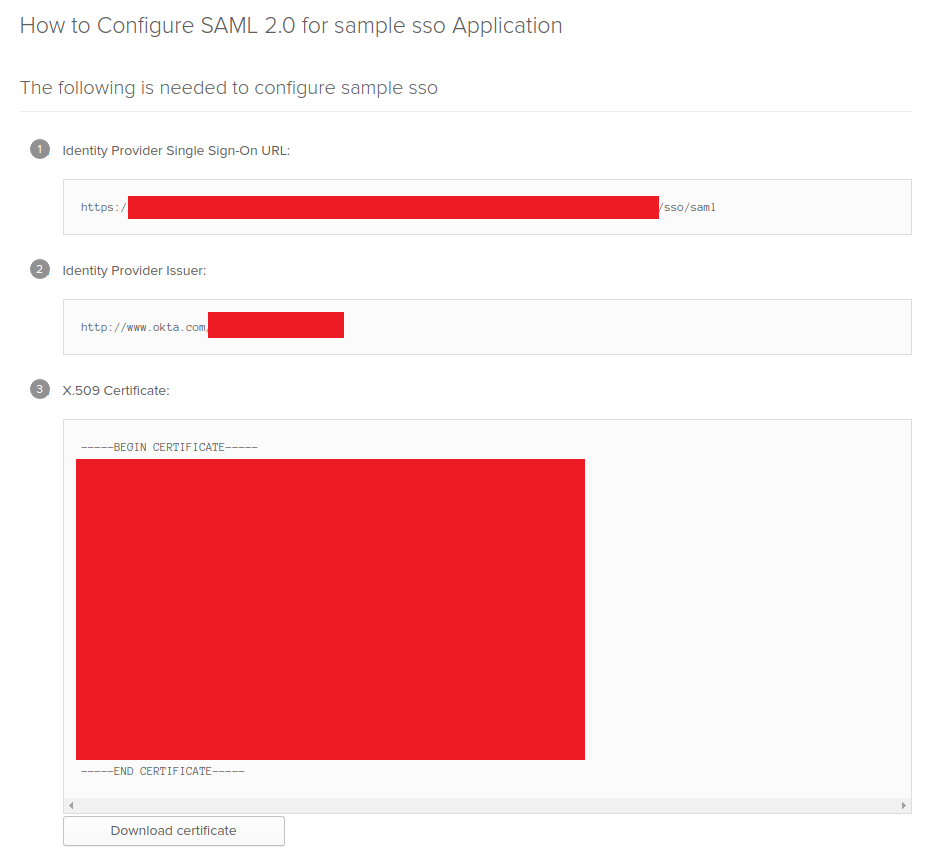
- Copy the following information from Okta to Security Center:
- Identity Provider Single Sign-On URL > IDP login URL
- Identity Provider Issuer > IDP entity ID/Metadata URL
- 509 Certificate > IDP Certificate (Starting after “-----BEGIN CERTIFICATE-----" and ending before “-----END CERTIFICATE-----"
- Click OK.
Add assignment to user
- Click on Assignement.
- Click on Assign.
- Click on Assign to People/Group depending on your setup in Okta.
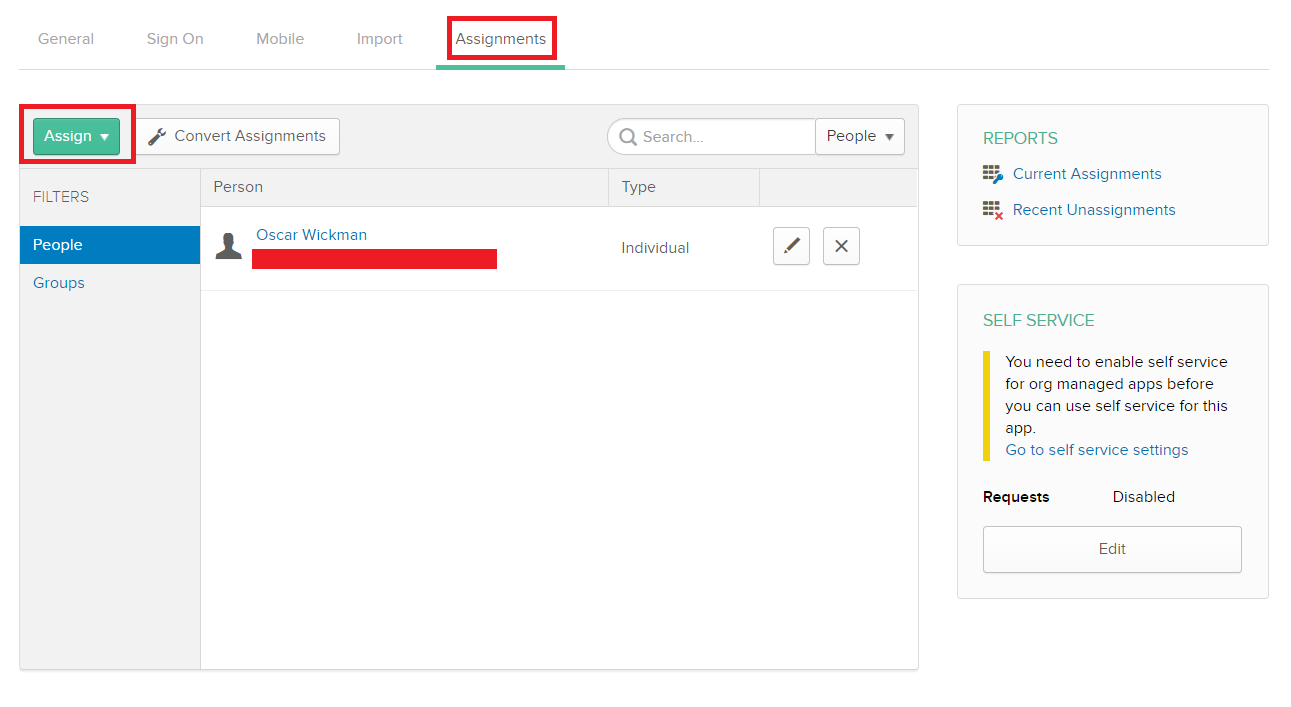
- Select your User/Users and click Assign.
- Click Done.